THE BOW-BOLT—Installation Instructions for a “RETROFIT”
Please Read First
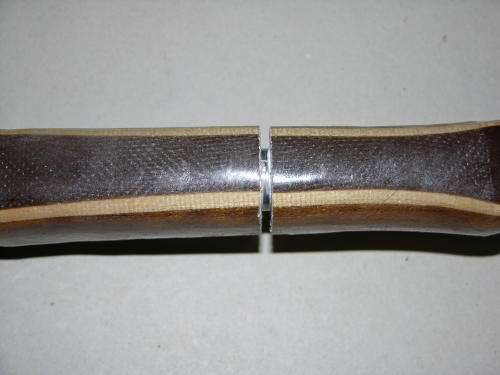
The Bow-Bolt has been tightened to the stop as you receive it. Please examine it before you loosen it or install it.
There is an “index” mark near the “half hole” in the edge of the flange. When the Bow-Bolt is tightened all the way to the stop, the marks on each half of the Bow-Bolt are lined up across the flange. It will take considerable force to loosen the Bow-Bolt to separate it while it is not installed in the bow, but it can easily be separated by hand when installed.
If you loosen it (to see how it works) before you install it, you will need two pair of large pliers or Vise Grips to do so, but BE SURE TO RETIGHTEN IT TO THE STOP BEFORE INSTALLING. Otherwise, the two halves of the bow will not line up properly when twisted together. Also, when using the vise grips on the female part of the Bow Bolt, clamp near the end away from the flange to avoid distorting it.
Be sure to clean all surfaces thoroughly with Acetone before installing. This includes the outer surface of the Bow-Bolt, the surfaces of the holes drilled in the riser and the surfaces that receive the micarta. Be sure that all surfaces have had time to dry thoroughly before applying the epoxy, and when you apply the epoxy (Smooth-on or MT-13 Recommended), be absolutely certain that all surfaces are thoroughly coated. It is a good idea to use your finger (with latex gloves on) and force the epoxy into the knurling on the Bow Bolt and against the walls of the holes.
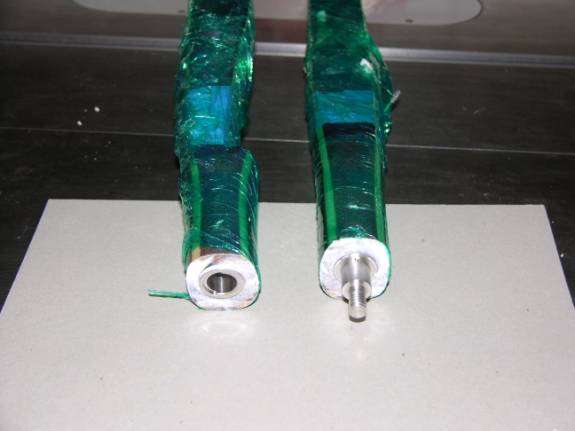
The male half of the Bow Bolt is the one with the “half hole” in the edge of the flange. It is best to orient the Bow Bolt with the male end in the bottom half of the bow and with the “half hole toward the back of the riser. Functionally, there is no difference, but with this orientation, the two parts of the bow will be closer to equal in length when the bow is separated, thus making it easier to pack for a trip.
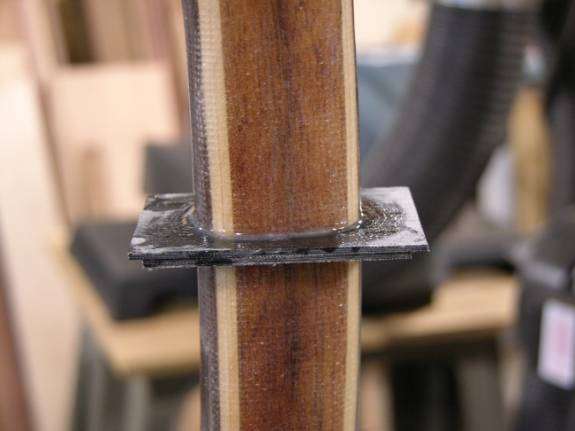
One last note: The thickness of the micarta shipped with your Bow Bolt may need to be reduced for a proper fit, but probably not by more than a few thousandths of an inch. A few strokes with 120# sandpaper is usually all that is needed, but at least be sure to lightly sand the surface of the micarta that will receive the epoxy before installing
Good luck, have fun, and please call if you have questions. (207-926-4133)
Craig
Most of the steps for retrofitting an already finished bow are similar to new construction, but since there are few, if any, straight and flat surfaces in the handle area of a bow, steps must be taken to provide some. It is these flat surfaces and straight edges that will allow you to clamp the bow firmly while cutting it and will also allow you to clamp the bow accurately and firmly while drilling the holes for the Bow Bolt. And finally, they will allow for clamping the bow accurately against a rigid straight edge or surface while the epoxy is curing around the Bow Bolt, thus assuring perfect alignment of the two halves of the bow when the process is completed.
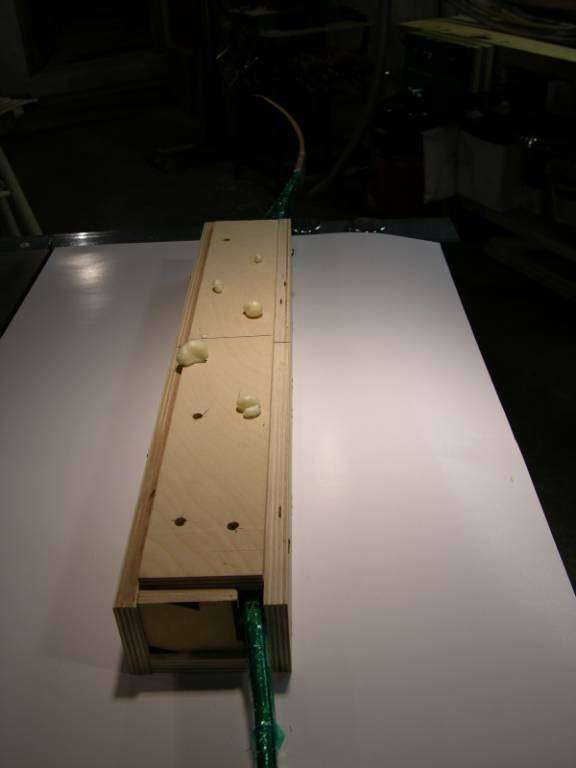
To provide straight edges and flat surfaces from which to work, simply make a small plywood box with open ends and open top measuring about three inches wide by about two inches deep by about two feet long. The exact dimension is not important so long as the handle section and a few inches of each limb will fit in the box. The rest of the limbs will be sticking out the ends of the box as shown in Photo 1.
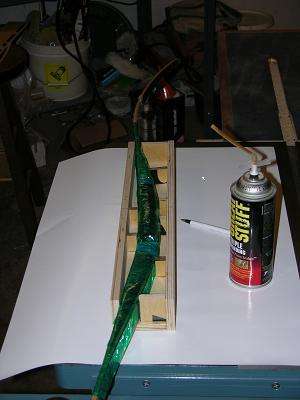
Cut some pieces of wood to close the ends of the box around the limb and some small pieces to “stabilize” the bow in the box as is shown Photo 1 and have a piece ready to screw on as a top. The small pieces used for the ends and to stabilize the bow can be set in place with super glue so they won’t move during the next process.
Before placing the bow in the box, it is a good idea to wrap it with “saran wrap or “cling wrap” to help in the clean-up process. You’ll see why this is important in a moment.
Also, it is important to determine the positioning of the Bow Bolt in the bow from belly to back, and also where the bow will be cut before you put the bow in the box so the cut line and center line of the Bow Bolt can be transferred to the outside of the box. The Bow Bolt should be installed closer to the back of the riser than to the belly when possible and it should go in a position where there will be at least 1/8” of handle material left at the narrowest point to the Bow Bolt.
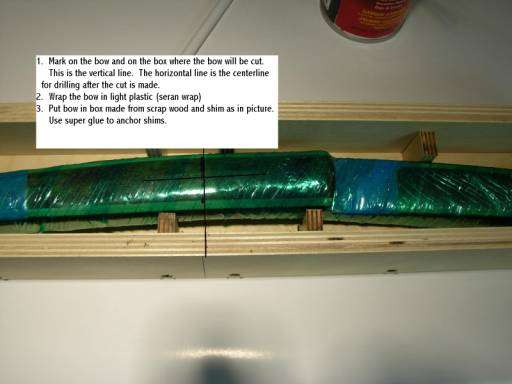
With positioning determined, transfer the cut line and center line to the outside of the box and then place the bow in the box.
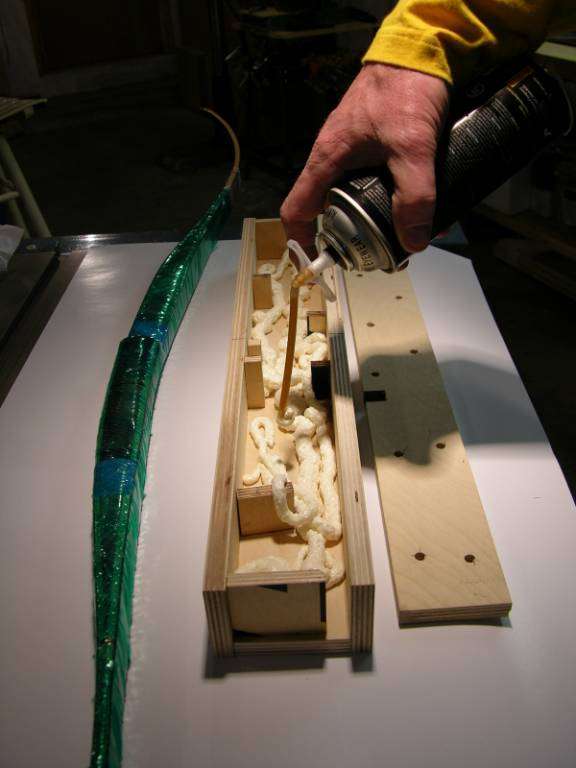
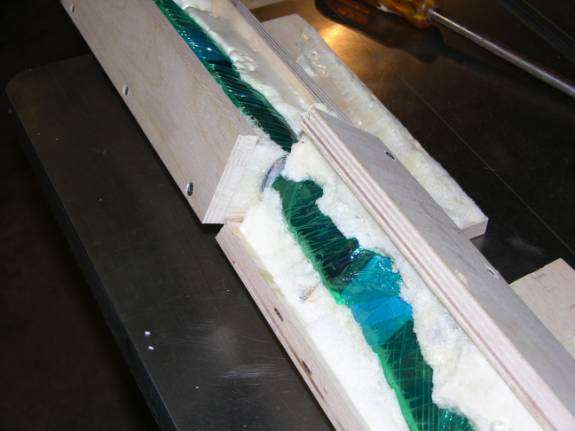
Next, fill the box about ½ way with triple expanding foam. This is normally used for insulating around windows and doors and can be purchased at most hardware stores.
.
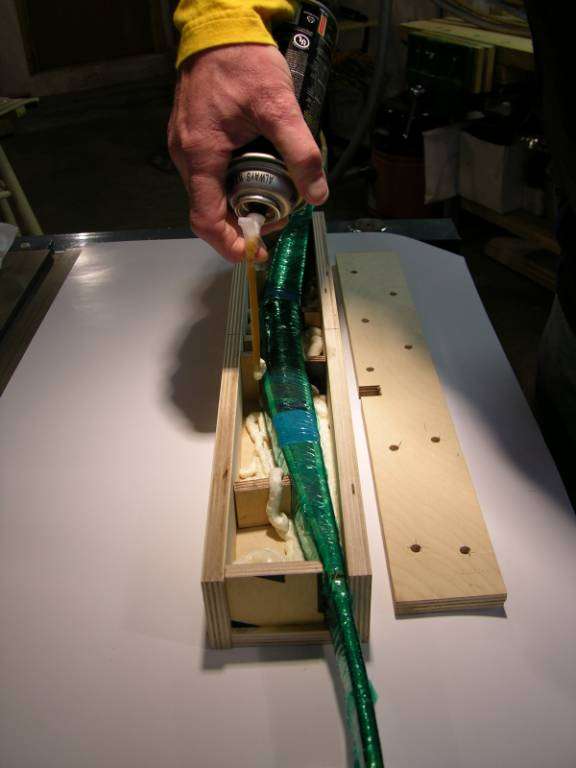
Immediately screw on the top and let the foam cure overnight. It is a good idea to drill some holes in the top of the box before screwing it on so the foam can expand fully. Some foam might also expand out the ends of the box around the limbs
CAUTION: Don’t put screws in line with where the box will be cut.
When the foam has cured completely, the bow will be securely “captured” in the box and you can continue with the rest of the installation.
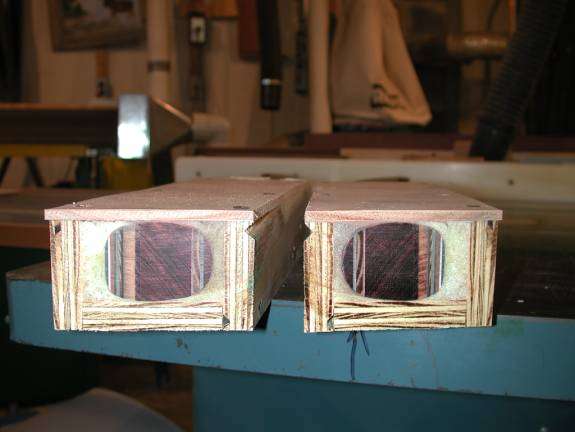
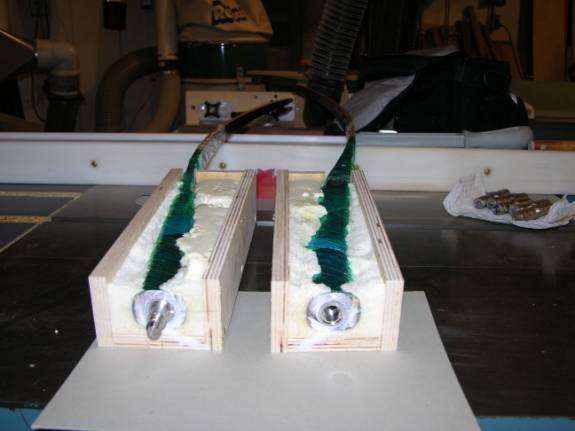
Since the bow was completed prior to the installation of the Bow Bolt, you will not need to use the wood filler pieces mentioned in the instructions for new construction, but when you epoxy the Bow Bolt in place, and after all clamping is in place, be sure to clean the excess epoxy that has squeezed from around the Bow Bolt before it cures. Several pipe cleaners work well.
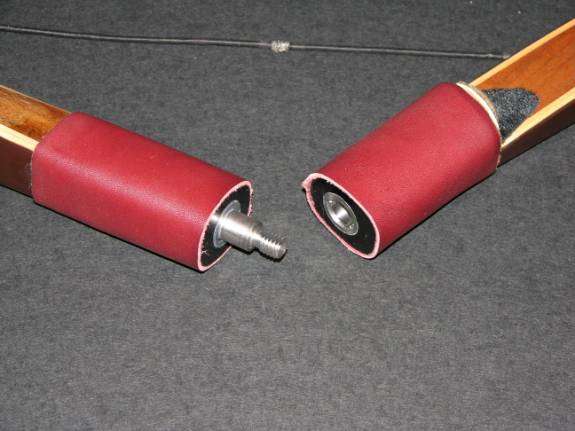
After the epoxy has cured, the bow can be separated, the surfaces around the Bow Bolt cleaned, and the micarta installed as described in the New Construction section of the website, (WWW.warrenarchery.com), and as shown in the photos below.
Note: The first few times you separate bow, both before and after you install the micarta, considerable force may be needed, but after a few times you will find the process to be smooth yet solid.